Getting started: for administrators
Start using the Swift Secure Signature Key
If you are a designated 3SKey administrator and need to setup the 3SKey solution for your
organization, then proceed with the following steps.
If you are an end user, please click here.
How to set up a 3SKey solution for your organization:
Show all
|
Hide all
-
Make sure you assigned two persons to be the administrators for 3SKey
The administrators will be responsible for the creation and management of the users.
-
Identify the persons in your organization who will need a token to sign transactions
You will need to know how many users (and tokens) need to be added.
-
Check that you received your tokens and a default token password from your bank
You need a minimum of two 3SKey tokens to perform the setup.
-
Ensure that you have at least 2 USB ports on your 3SKey host
This is required during assignment of the administrators and for adding additional users.
Ensure that you have 2 unactivated tokens and a default password that you received with the tokens. Then
you can proceed as follows:
1. Insert the first token into a USB port
2. Log in
Go to
http://www.3skey.com
and click on
"Log in".
Important
You must use Microsoft Windows and
your browser must be correctly configured.
You will be asked to enter the default password during this procedure.
Your Unique ID will appear (for example, corp12345678). Once the token has been activated, it must be
registered with each bank with which you have a relationship.
Important
This operation will take a few minutes. Please do not cancel the operation by closing the browser or
unplugging the token. If the connection times out or hangs for more than 5 minutes then you should
restart the browser and log back in, the activation will resume from the last step.
3. Accept the terms and conditions
After logging in, you have to accept the Terms and Conditions related to accessing the 3SKey Portal. Tick
the box and click
"Continue".
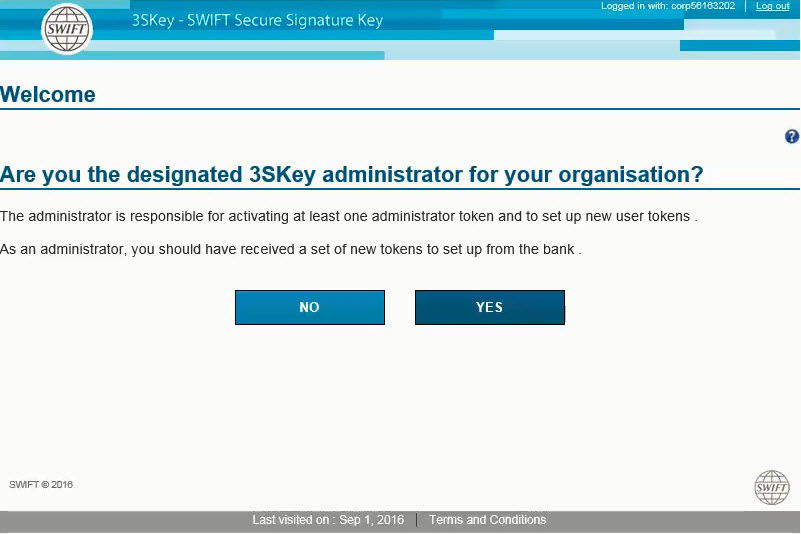
A message is displayed asking if you are the designated 3SKey administrator for your organisation. If you
are setting up a new group of users for your organisation click "Yes". Else click
"No" and contact your administrator who will add this token to the existing user group.
4. Insert the second unactivated token
The following window appears:
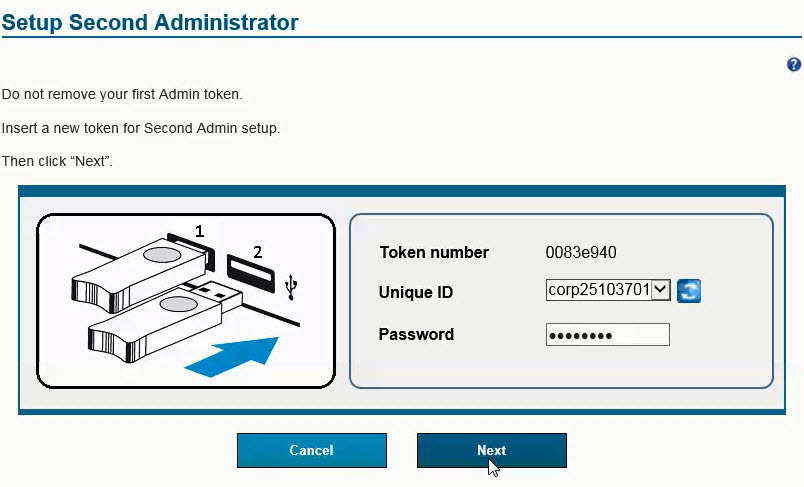
Insert the second unactivated token into another USB port,
without removing the first token. These two tokens will become the administrators of your
tokens on the 3SKey portal.
Enter the password for the second administrator token and click
Next. This is the
default password that you received with the tokens.
5. Give the second token to the second administrator
Remove the second administrator token from the USB port (still without removing the first administrator token) and give it to the second administrator. The second administrator must login to the 3SKey portal with
the token to activate it.
Ensure that the second administrator has the default password received with the token.
The portal automatically continues with the activation of the first administrator.
To activate the first administrator token, follow the instructions on the screen:
1. Select a PIN policy
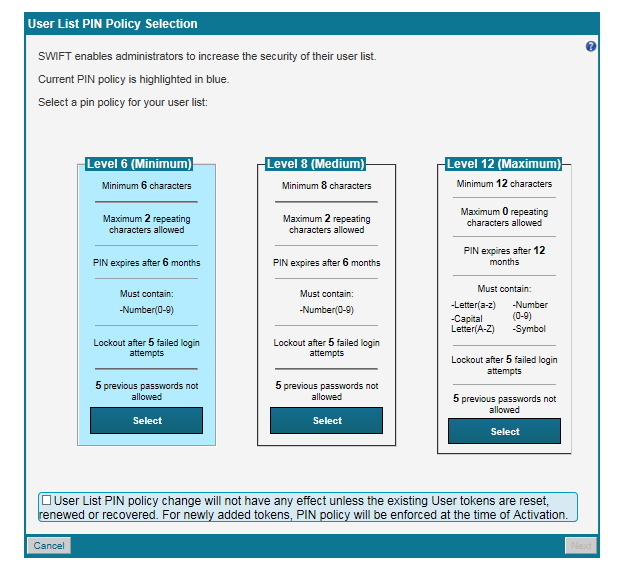
Select a password policy that will be applicable to all the tokens in your organisation. This screen is
only displayed the first time an administrator token is activated for a group with no PIN policy defined
yet. If necessary the policy can be modified again later on. Tick the box at the bottom then click on
"Next".
2. Choose a new personal password
Important
Be sure you store the password safely. If the password is lost or if the token is locked after entering
five consecutive incorrect passwords, then the token can only be reset with the help of another
administrator.
3. Register your e-mail address
The registration and management of your e-mail address is entirely under your control. On the 3SKey portal,
you can register, change, or remove your e-mail address at any time.
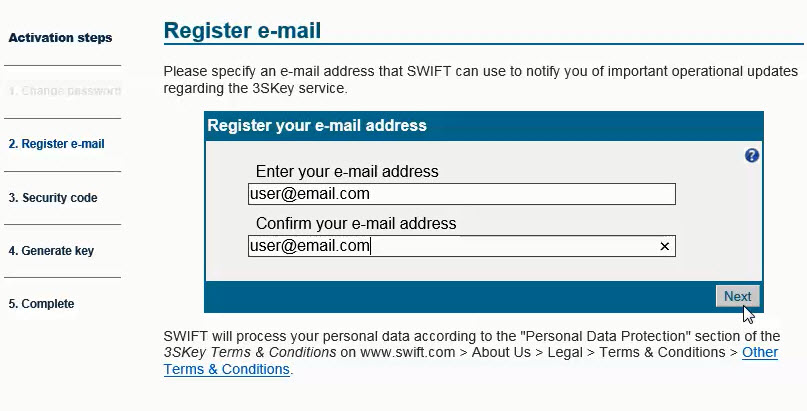
- Type the e-mail address that you want Swift to use for operational notifications.
- Confirm your e-mail address by re-entering it.
- Click "Save".
4. Download the security code
The security code is generated automatically during token activation and allows the reset of a token or
the recovery of the Unique ID to a new token which avoids the need to re-register with the banks with
which you have a relationship.
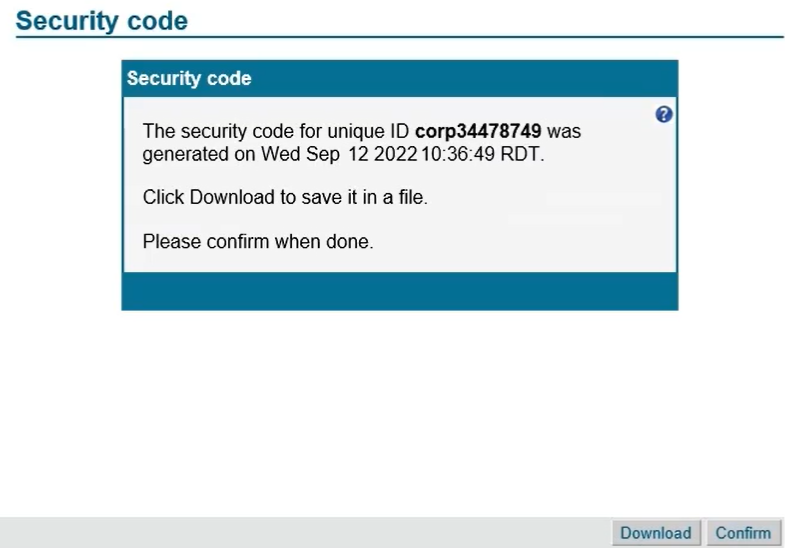
Click on Download to download the security code as a .txt file. By default the file will
be saved in your Downloads folder. Then click on Confirm to proceed.

Open the Security Code file and check that it contains a 16 characters code in the format
XXXX-XXXX-XXXX-XXXX. This code is personal and must not be shared.

Important
Be sure you store the security code safely. If the password or token is lost, then you need the security
code in order to reset or recover the token.
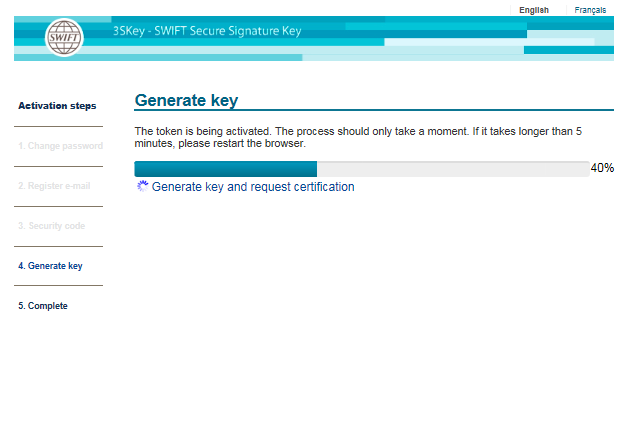
5. Generate key
The certificate is being activated. This process takes a few seconds. If it hangs for more than 5 minutes
then restart the browser, log back in with the new password and retry the operation, the activation will
resume at this step.
6. Activation is complete
When activation of the token is complete, the following screen appears:
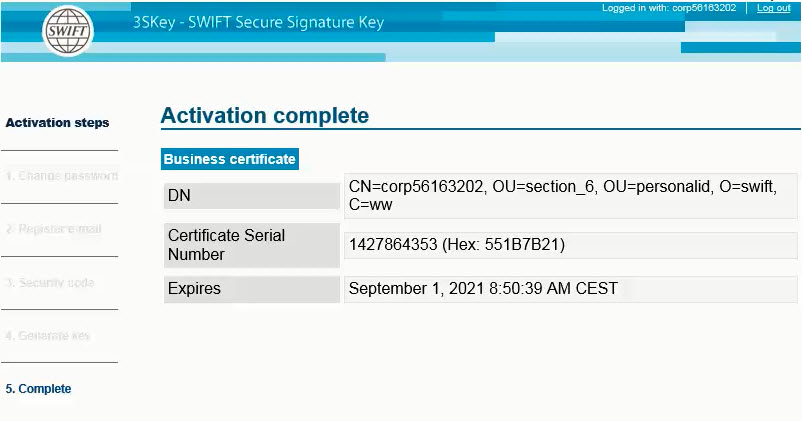
The token is now activated and can be used to sign transactions and administer user tokens.
As an administrator, you can add 3SKey users as follows:
Ensure that you have the unactivated tokens and the default password that was received with the tokens.
Note: The second administrator provided during the previous steps, was already added
automatically. Administrator tokens are also user tokens and can be declared to your partners to
authentify or sign transactions, however we recommend that you keep at least one administrator token for
token management purposes only.
1. Insert the Administrator token into a USB port.
2. Log in
Go to
http://www.3skey.com
and click
"Log in".
Enter your personal password.
The following window appears:
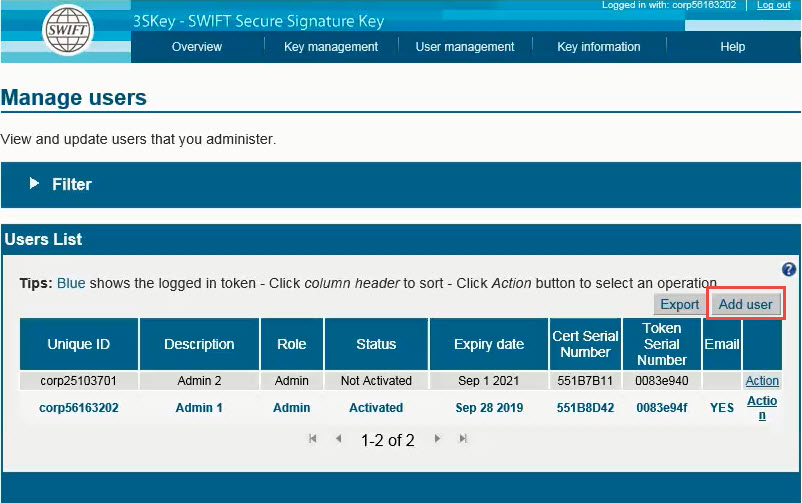
3. Click "Add user"
The following window appears:
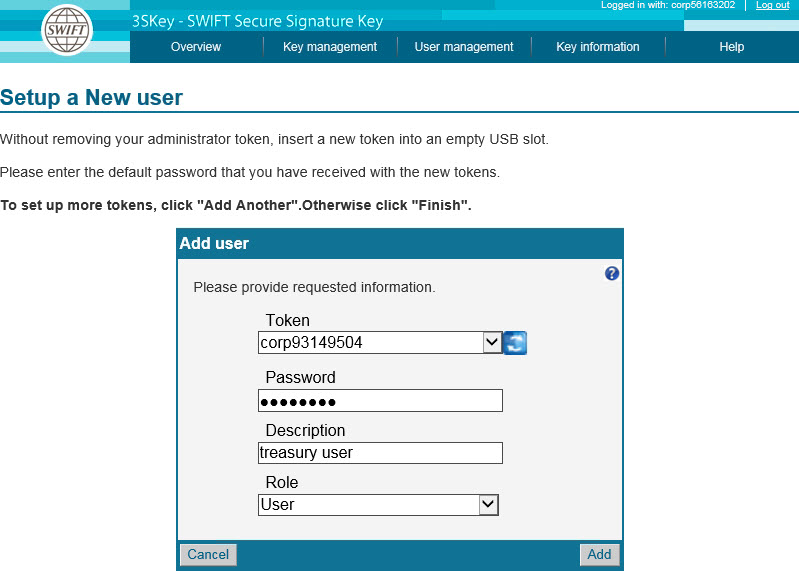
Insert an unactivated token into a second USB port,
without removing the Administrator token.
4. Enter the default password and a meaningful description
In the Add user window, enter the default
password and type a meaningful
Description. In the
Role field select
User to add a
signer, or
Admin to add an additional administrator token.
5. Click "Add"
The following window appears:

A user token has been added.
To add another token, click "Add another" and repeat this procedure.
To finish adding tokens, click "Done".
Give a not activated token and the default password that was received with the tokens to each user/backup
administrator.
Users and administrators must follow the
Getting started Instructions for the 3SKey User to login to the 3SKey
portal and activate their token.
Note: Always ensure you perform the Add user procedure before you give the token to the
user.


